Base asset tools in ImageMagick
Wednesday, June 6, 2012 - 15:54
I wrote a couple tools using ImageMagick to help me work with the base assets, and I figured I'd share them here. Note, I've only tested these in Ubuntu 12.04, but it should work in any Linux distro that has bash 4.0 or newer and a somewhat recent ImageMagick. I assume it works the same on Mac and Windows (through Cygwin).
This first one takes a spritesheet built on top of the base sprites and turns it into an animated GIF. Here's the code:
It's used like this:
./Spritesheet2AnimatedGIF.sh [spritesheet] [GIFoutputname]
And attached is before and after. Anybody else doing something similar? Feel free to share!
Attachments:
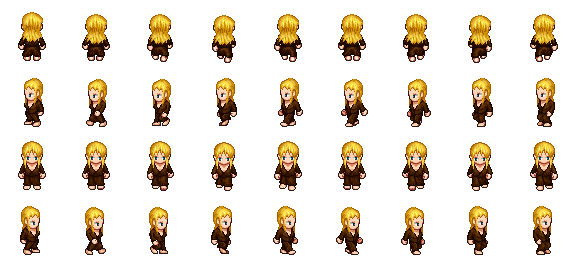

My second script was much more complex: it turns the hair samples into overlays of the walking animation. The animation shown above uses the output directly. Here's the code:
http://pastebin.com/5MAssxMM
It's used like this:
./HairSample2Overlay.sh [HairSampleFile] [OverlayOutputFilename] [optionalRow]
If you provide a row, it only converts that row into an overlay sheet. If you don't provide a row, it converts each row into its own, separate overlay sheet.
Attached is the before and one of the output sheets (the last row, in this case). Note that the hair is offset with the animation, e.g. the second sprite from the left in the bottom row is 1 pixel lower than the first one in the row, and the hair is offset the same way. The output will need a bit of tweaking for best results, but hopefully it's a good starting point.