Tiling Tarmac
Thursday, July 29, 2010 - 12:42
Art Type:
License(s):


Collections:
Favorites:
3
Preview:
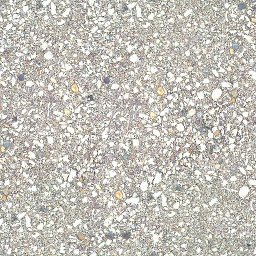
A quicke tilable (1024x1024) version of the tarmac texture posted here:
http://opengameart.org/content/weathered-tarmac
Also quickly made a darker version; png because that is lossless.
Created with the GIMP resynthesizer plugin:
http://www.logarithmic.net/pfh/resynthesizer
And this instructions:
- Open source image in Gimp.
- Select a area in the image to be used for the texture. It must be fairly uniform in the tonal range and have sides that is power of two (32x32, 64x64, 128x128, 128x64, etc.) to be video card friendly.
- Copy and paste the area into a new image.
- Apply the high-pass filter, called Resynthesize in Gimp (Filters/map/resynthesize)
- Offset the image by choosing 'Image > Transforms > Offset' or press Ctrl+Shift+O. Offset by x/2 and y/2. to check if it tiles correctly
- Use clone, smudge and other tools to erase the visible seam. (was not necessary in this case)
- Offset again to get the image back to normal.
- Possible run the high-pass filter again to remove any low-frequency features introduced by you. (was not necessary in this case)
File(s):
Textures in this Pack
 |
 |
Comments
What do you mean by high-pass and low-frequency?
"High pass" is a technical term for what the resynthesizer plugin does, don't ask me about details ;)
"low frequency" patterns are for example a single bigger dark area in the texture that when the texture is tiled is really visible as repeating with a low frequency and thus destroys the illusion of an "endless" texture.
"High frequency" is being used here to refer to suden changes in the levels, or high contrast areas where one form ends, and another begins. A "High frequency pass" filters out everything but theses sharp changes, essentially leaving you with the outline of an image. In this context, it could be used either to sharpen the image, by using the outline to emphasise the contrast, or the opposite, to reduce the obviousness of a seam in the tiling image.
http://www.gimp.org/tutorials/Sketch_Effect/